The Ultimate Guide to Oil-Based Colored Pencils Techniques for Flawless Realism.When artists begin exploring professional drawing media, they are immediately faced with a major decision: should they choose wax-based or oil-based colored pencils? While wax pencils are famous for their soft, creamy feel, oil-based colored pencils have become the ultimate weapon for professional fine artists and illustrators seeking extreme precision, endless layering capabilities, and long-lasting vibrancy.
If you are looking to create crisp details, smooth skin textures, or hyper-realistic drawings without experiencing waxy buildup, oil-based colored pencils are exactly what you need. Let’s dive deep into what makes these professional pencils unique, their advantages, and the essential techniques you need to unlock their full potential
What are Oil Based Colored Pencils?
Every colored pencil consists of pigment held together by a binding agent. Unlike standard student grade pencils that rely heavily on wax, oil based pencils use a vegetable oil binder to hold the pigment together. This unique chemical composition gives the core a much harder, firmer consistency.
Because the core is firm, oil based pencils glide across the paper with a sleek, controlled friction. They deposit a slightly more translucent layer of color than wax pencils, requiring artists to build up color slowly rather than laying down thick chunks of pigment immediately.
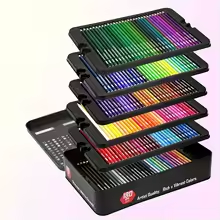
- Popular Oil-Based Brands: Faber-Castell Polychromos (the undisputed industry king of oil pencils), Holbein Artists’ Colored Pencils (known for their unique creamy oil hybrid), and Lyra Rembrandt Polycolor.
The Pros and Cons of Oil Based Cores.
Before you invest in a professional set of oil pencils, it is important to understand the specific strengths and challenges of working with this medium.
The Advantages
- Precision and Detail: Because the lead is hard, oil pencils can be sharpened to a needle-like point without snapping. This makes them absolute magic for drawing fine details like animal fur, human hair, or glass reflections.
- No “Wax Bloom”: Heavily layered wax drawings can develop a cloudy, foggy white film over time known as wax bloom. Because oil-based pencils use a vegetable oil binder, they will never produce wax bloom, keeping your dark colors rich and deep forever.
Endless Layering: Wax pencils fill up the tooth (texture) of paper very quickly. Oil pencils apply color in thin, translucent glazes, allowing you to apply dozens of layers on top of each other to create complex, realistic color blends.
The Challenges .
- Takes More Time: Because oil pencils deposit less pigment per stroke, coloring large background areas takes much more time and patience compared to using a soft wax pencil.
- Harder to Blend Quickly: You cannot easily “smoosh” oil pencil colors together on the paper like you can with buttery wax pencils. Blending oil pencils requires a meticulous, slow layering technique.
Essential Techniques for Oil Based Pencils.
To truly make your artwork shine with this medium, you must shift your mindset and apply these three highly effective professional techniques.
- Master the “Glazing” Technique.
Because oil-based pencils are highly translucent, you can use them exactly like a classical oil painter uses liquid glazes. Instead of trying to find the exact pencil color you need, create your colors directly on the paper. Apply a light layer of blue, overlap it with a light layer of yellow, and you will create a rich, luminous green that has far more depth than a single green pencil stroke ever could.
- Solvent Blending for Smooth Gradients.
Because oil pencils do not blend easily by rubbing them together, professional artists use a secret weapon: odorless mineral spirits or rubbing alcohol. Apply your oil pencils lightly to map out your shadows and midtones. Then, dip a paint brush into a tiny amount of solvent and brush it over the drawing. The solvent will instantly melt the oil binder, turning your pencil work into a perfectly smooth wash of paint.
- Use Directional Stroking.
Since oil pencils leave very crisp, visible lines, you must pay attention to the direction of your hand movements. Always move your pencil in the direction of the object’s form. If you are drawing a rounded apple, use curved, arc-like strokes. If you are drawing flat wood, use long, straight strokes. This enhances the illusion of 3D depth.
Conclusion.
Oil based colored pencils are a truly elite medium for any artist dedicated to capturing crisp details, smooth skin tones, and extreme realism. While they require a bit more patience and a slower workflow than wax pencils, the stunning, professional, and archival results they yield are worth every single second of effort. Grab a high-quality set, practice your glazing, and watch your artwork elevate to a whole new level!